Macros are a very powerful part of Kentico and can be essential when it comes to extending admin areas of Kentico and adding your own custom modules and UI elements. This simple - sometimes overlooked tip - will help you along your way.
Kentico provides the developer with a powerful tool in the shape of macros. Most developers who have either developed with the Kentico portal engine or extended the admin area will have come across them. Surprisingly, most people I speak to are reliant on the event log when they need to figure out why their page or permissions are not working. What can be much more helpful is to use the Macro Console
How to open and use the macro console
To open the macro console in Kentico, you navigate to System > Macros > Console (see below). The console itself is fairly straightforward. Once opened, you see the following four elements:
- A text area for entering your expressions
- An option of the evaluation mode to be used
- A results tree
- An output text area

Expression
This is a simple as it sounds; a text area for entering a macro expression that you want to evaluate. It benefits from auto-complete to make your life easier and will take account of any custom macro methods or module classes that you have registered in your solution.
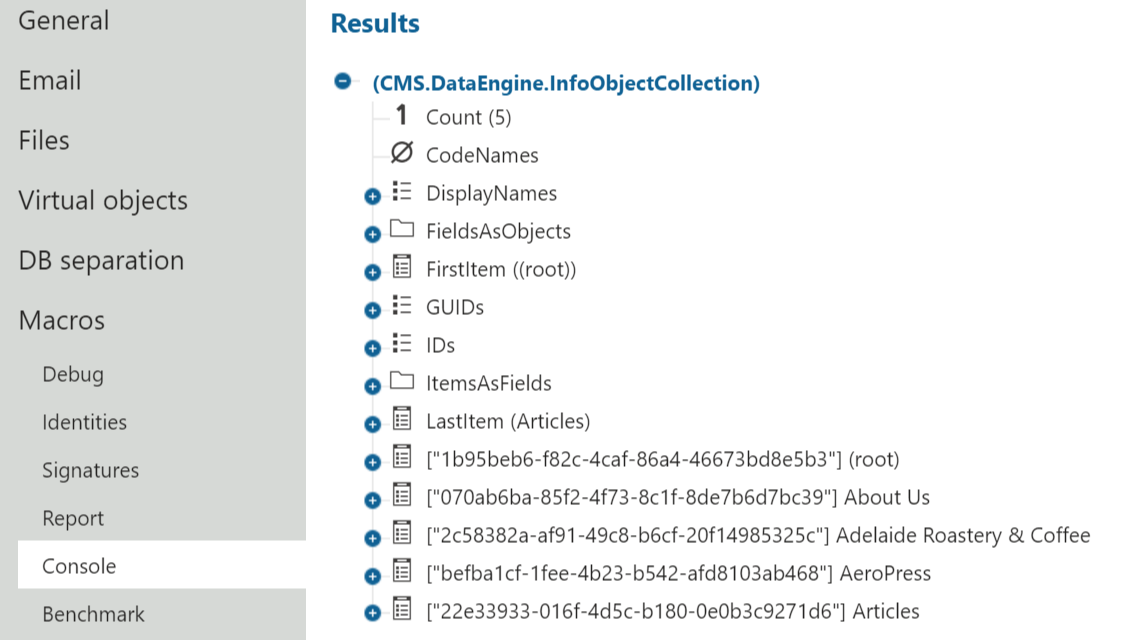
As an example, entering the expression SiteObjects.Documents.TopN(5) will return a list of the top 5 documents on the site (ordered by Node ID).
You’re able to do quite a lot in here, from simply listing our objects or properties to applying transformations. So something like ...TopN(5).ApplyTransformation("Ridgeway.Product.Card") would result in the generated markup from the supplied transformation being displayed in the Output.
Evaluation modes
The three evaluation modes that you have available are:
- Virtual Data
- Real data
- Real data with displayed values
These options affect how the information in the macro tree are presented back to you. I personally find the Real data with displayed values to be the most useful mode, as you get to see the display names in the tree.
Results
The results are a macro tree representing the returned result of the resolved expression. Clicking on an item in the results tree will update the expression. The next time you click Execute, your updated expression is the one which will be run.
In our example above, we get and InfoObjectCollection, which contains 5 elements. If you’re using Real data with displayed values, then you should see something like this in the result:

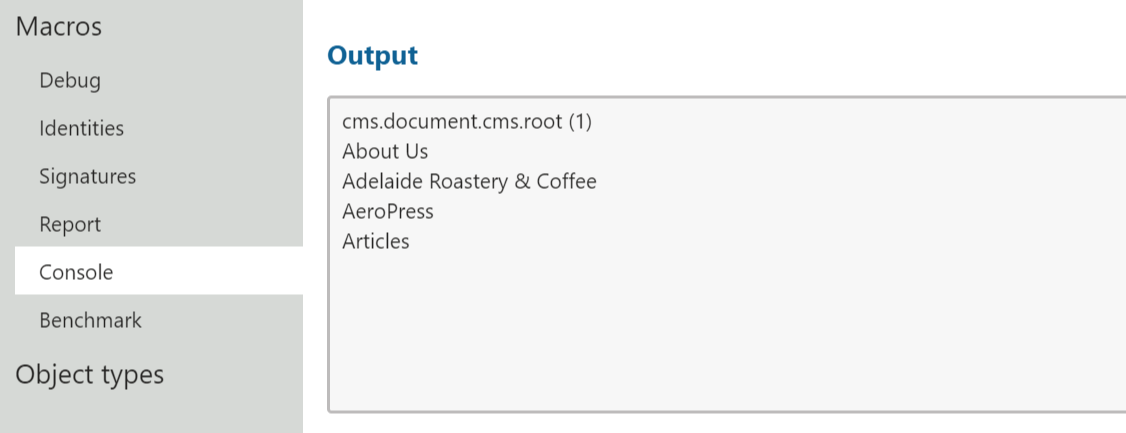
Output
This is the text output of the resolved expressions. I’ve found this to be of most use when quickly testing transformations in modules, simple text transformations, and checking UI element permissions.
Again, with the above example you’ll see something like this:

Example - UI Elements
A recent project I’ve been working featured a lot of extensions to Kentico with a single, large module that encapsulated areas of the businesses order fulfilment. This meant a lot of new classes and a lot of checking permissions before accessing data. Permissions and a UI access are of course all delivered out-of-the-box with Kentico, but we needed more. An example of this was that we had physical stores that would accept click-and-collect orders. Members of the store team needed to be able to log into a collection management application that we created in Kentico to view and manage the orders for their store. Here, permissions and UI controls can only do so much, we either need to start creating some custom pages and controls, order use Kentico's UI tools to filter the data that individuals can see.
The model we built was to create a binding table between our Store class and Kentico’s User class as shown below.


This binding table was then used to show a list of all of the assigned users for a given store (or vice versa) so that the admin team could set up the users correctly. All of that was pretty straightforward, but limiting the data for a given user was where we needed to start using macros.
The first macro method in use was simply called GetUserStores. As its name suggests, this method returns a list of the stores which the user is already assigned to. There is also naturally a counterpart that will return the users assigned to a given store.
For the UI element, we just used a simple UI grid as described in the Creating Custom Modules example in the Kentico documentation; the macro method was going to be used to filter the data that the UI grid would display. This was achieved by setting the where condition of the listing to the following macro expression:
This says that anyone with the ViewAllStores permission or who has an admin privilege or above can see everything, otherwise, we limit the list of results to those that the current user is assigned.
By now you’re probably wondering when I’m going to get to the bit about testing macros rather than how we built the UI. The above expression was originally written using the Macro Console. The key part of the expression above is CurrentUser.GetUserStores().Table.Rows.Transform("{%StoreID%"+"},") %}. This is a fairly simple expression, but to make sure we get it right, we created it in the macro console before testing in the UI grid. One thing that always catches me out when using Transform() is that I can't terminate the expression using %}. Doing this prematurely terminates the entire macro expression, so you need to break it apart by concatenating the string. Finding this out in the Macro Console is much easier than wondering why your page isn't quite loading as you'd expected or why the UI page that you just made isn't displaying the data that you'd expect.
Summary
The Macro Console is a great and underused part of the Kentico platform. It allows a developer to quickly test out the expressions that they need without needing to make more fundamental changes to transformations or UI elements. It’s also very useful in production sites for quickly checking information in a safe manner (i.e. not digging about in SQL server). Now that we're preparing to move on to Kentico 12 and aiming towards MVC for future solutions at Ridgeway, I still know that this is going to continue to play a role for us as we continue to build on top of Kentico admin UI to meet our client’s needs.